
How to make a personalized cushion cover
Are you planning to redecorate your kid’s room? Or do you want to surprise someone with a cute and cuddly throw pillow, for which you made the cover yourself? Here is one simple idea you will love!
You can buy a ready-made decorative cushion cover and follow the below steps to personalize it for your kid’s room.
What you need:
- a big sharp scissors
- a small scissors, for details
- black and white thread, needle and pins
- 2 pieces of felt, one white and one black (hobby stores sell it in ‘sheets’ in the size of a letter paper)
- special glue for textiles (also from the hobby store)
- thin carton (can be replaced with simple paper)
- black pencil
- carton or wooden board and a few weights (books, dumbbells etc.) to press after gluing
If you are skilled and you like sewing, you can sew the whole thing. I went for the fastest and easiest way, the glue for textiles resists quite many hand washes and it was just a decorative pillow, after all.
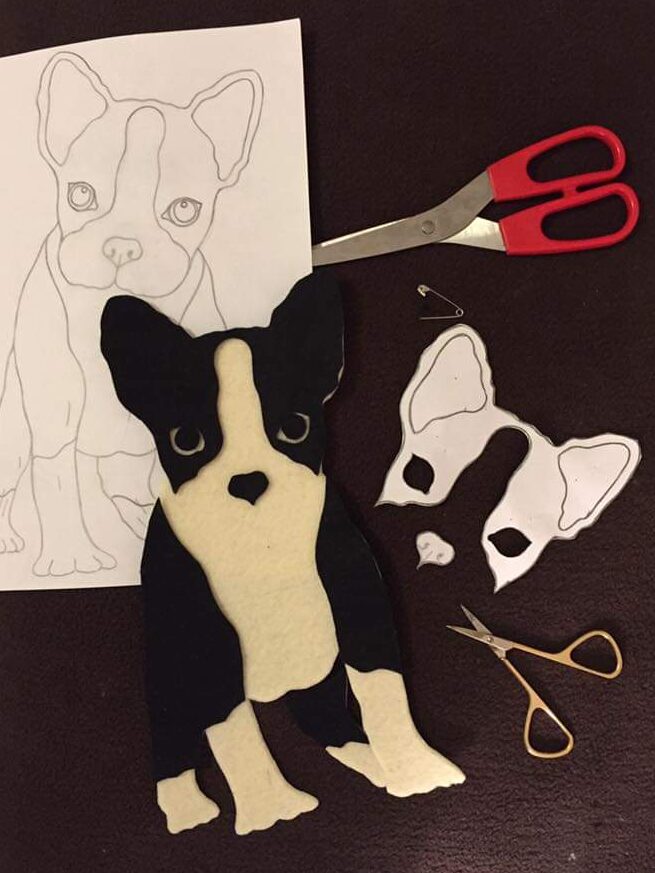
Step 1: Cutting the felt
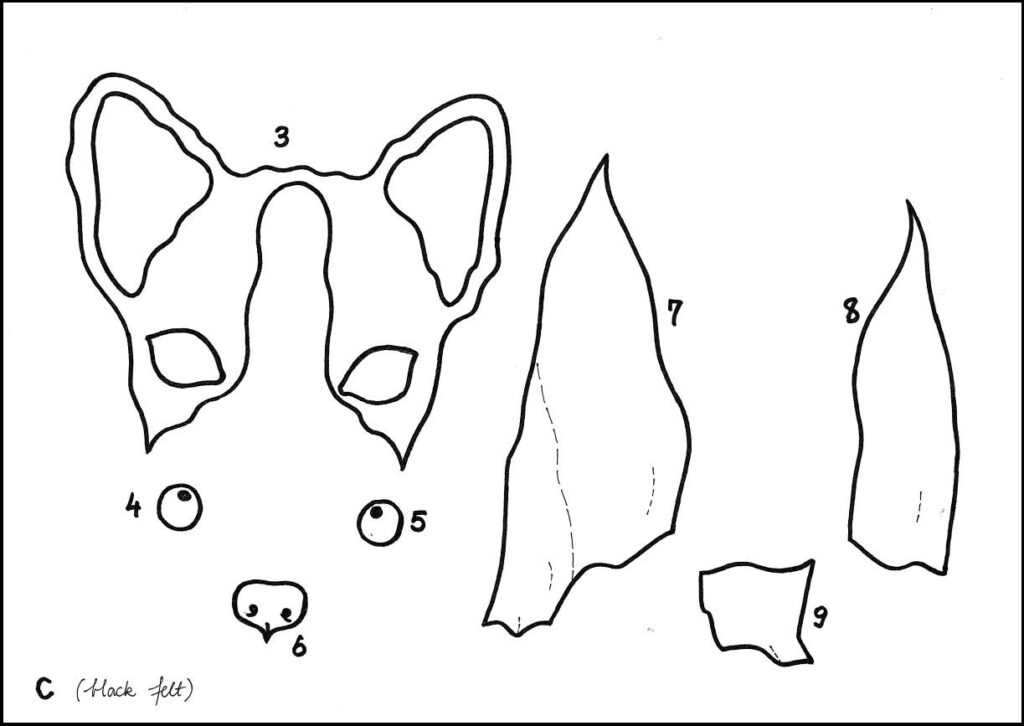
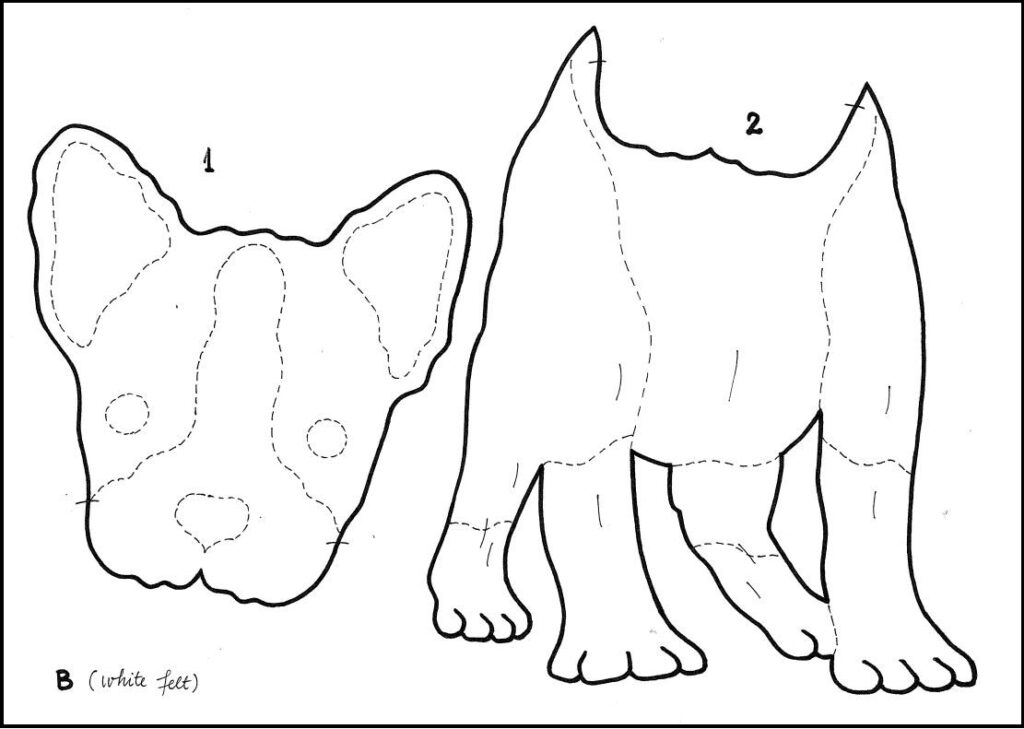
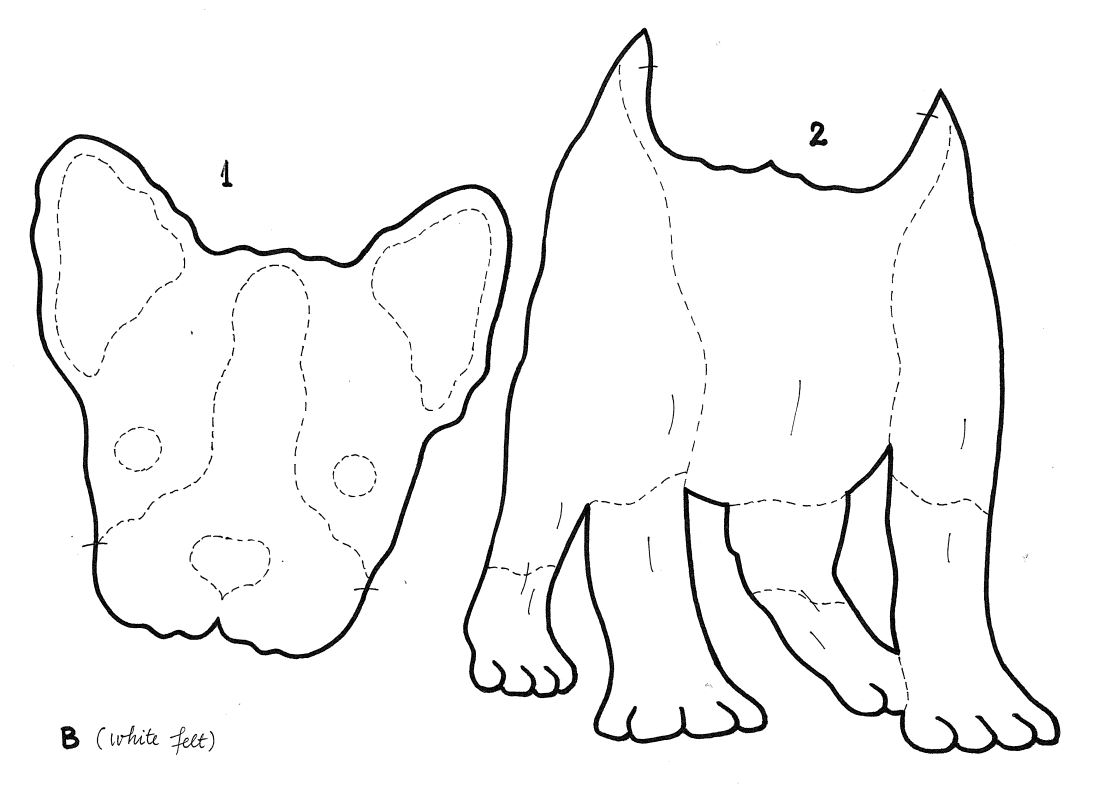
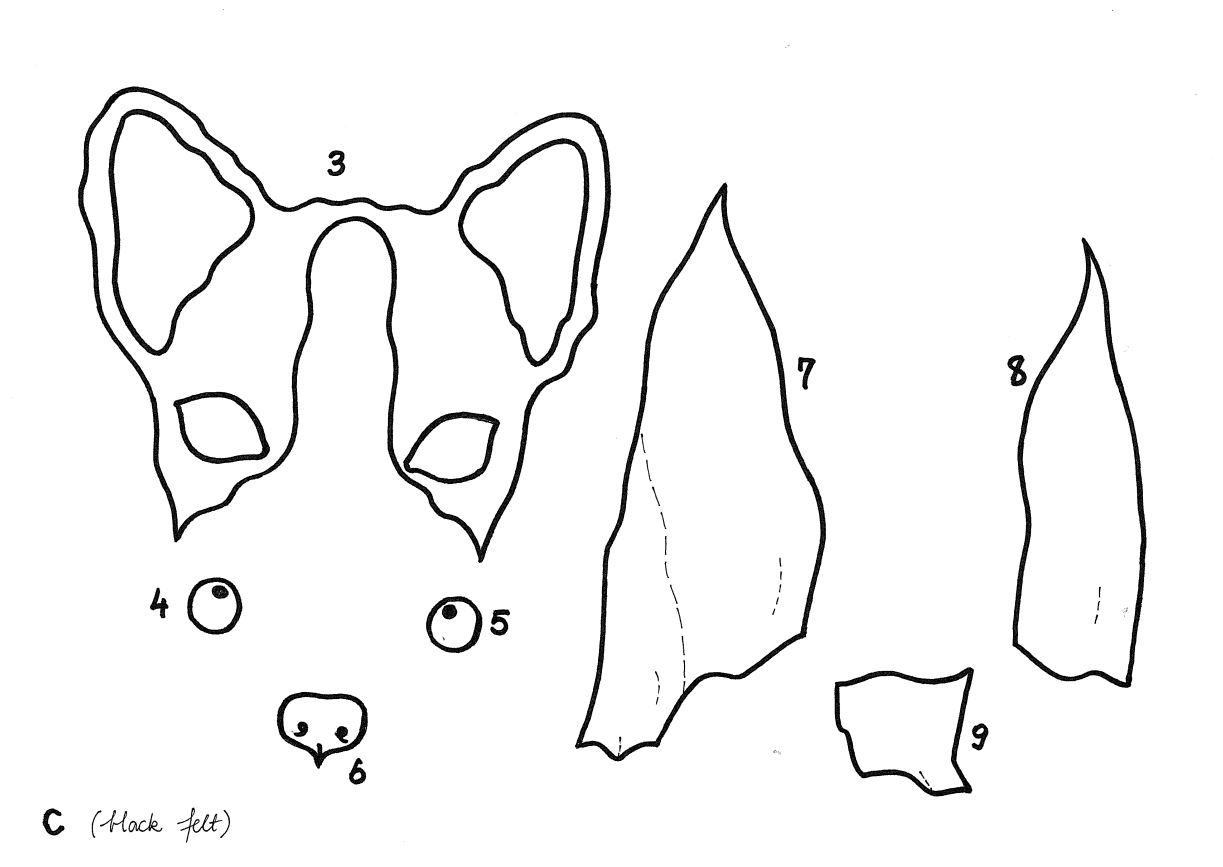
Use images B and C to cut patterns from thin cartons. That will make it easier to transfer the shapes on the felt. On the black felt, use pins to pin the carton pattern on it, then you cut directly, around the carton.
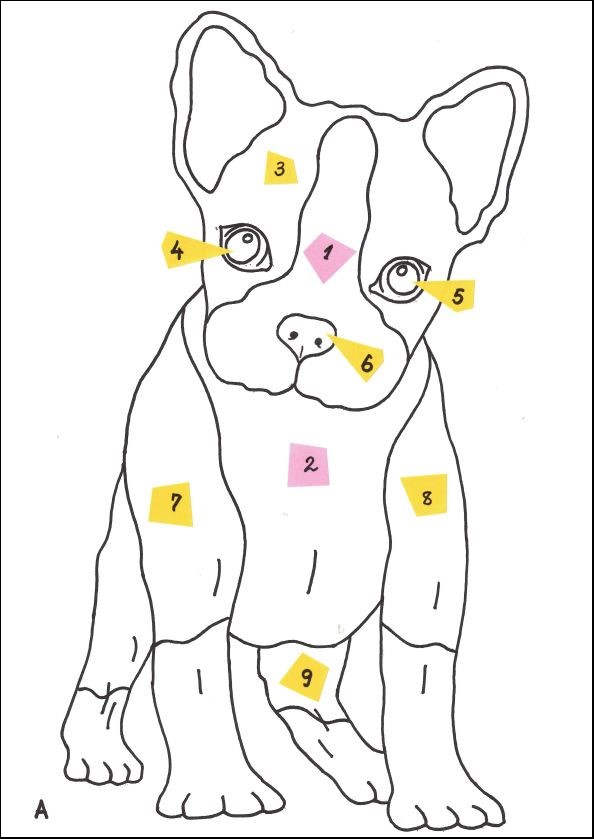
Step 2: Assembling the image on the cushion cover
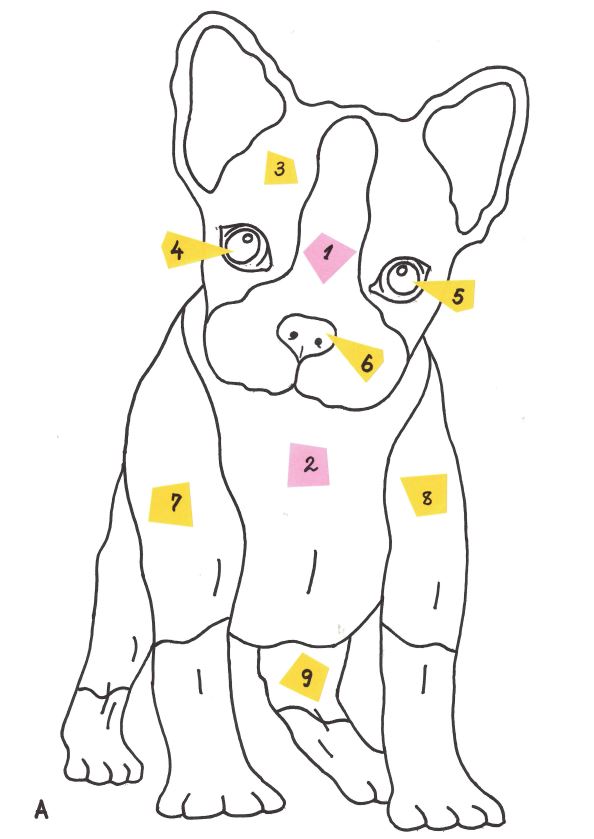
When you are done cutting the felt, put all 9 pieces together on the cushion cover using Fig. A, just to see how it looks.
Make sure it is centered and straight until you are happy with the position.
Use a few pins to mark on the cushion cover the place where you are going to glue the felt pieces: tips of the ears, sides of the neck, shoulders and paws.

Step 3: Gluing the felt pieces on the cushion cover
Before you start gluing, remember to:
- read the instructions on the glue, to see how to apply it and if there is a wait time before sticking the pieces together!
- apply the glue carefully on the felt shapes and their margins: it must be enough to be absorbed in the cover fabric and glue it but not too abundant, to be ‘sucked’ and shown on the fabric!
- insert a plastic bag in the cushion cover, to prevent gluing it together, in the unfortunate case that the glue passed through the fabric!
Remove the felt pieces and begin to glue the first layer, following the pins marking the position on the pillow. Start with the first layer, of white felt, using image B – patterns 1 and 2. Glue the felt on the cushion, following carefully the pins marking the contour.
Put on the board and the weights you prepared (could be just a big book) and press it for at least 15 minutes, or according to the glue instructions.
Continue with the second layer, of black felt, using image C – patterns 3 to 9. For the second layer, the black felt it is easier to glue because the shape is already in place and because the basis is also felt, not the thin fabric, so there are fewer issues with too much glue.
Press again, using the board and the weights and wait for the glue to dry.
Step 4: Sewing the details
After the glue is completely dry, sew a few accents, as you see in the final product, using the black thread on the white felt and the white thread on the black felt, for contrast.
If intended to be a gift, you can add a final touch with a little bow in a matching or contrasting color. Tip for the bow: Make it removable, in case the owner prefers the puppy without it. I mean you may want to sew it instead of gluing the bow.
My story & inspiration:
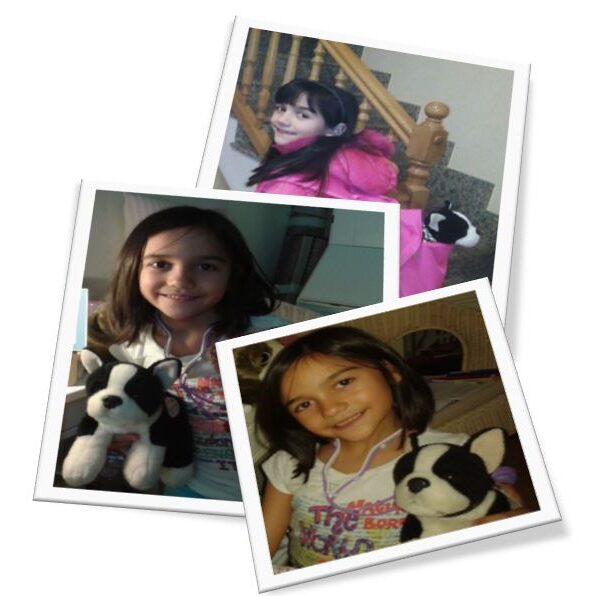
Years ago, my niece Maia was redecorating her room and I wanted to surprise her with something useful and with a personal touch.
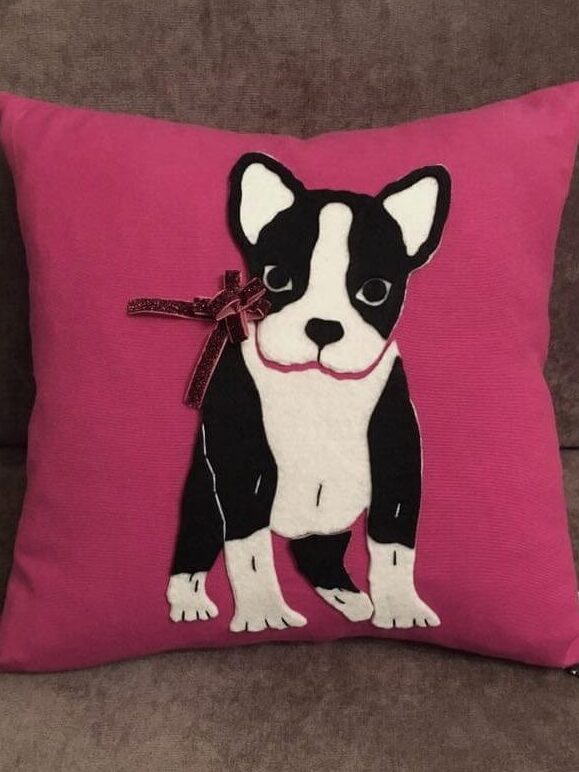
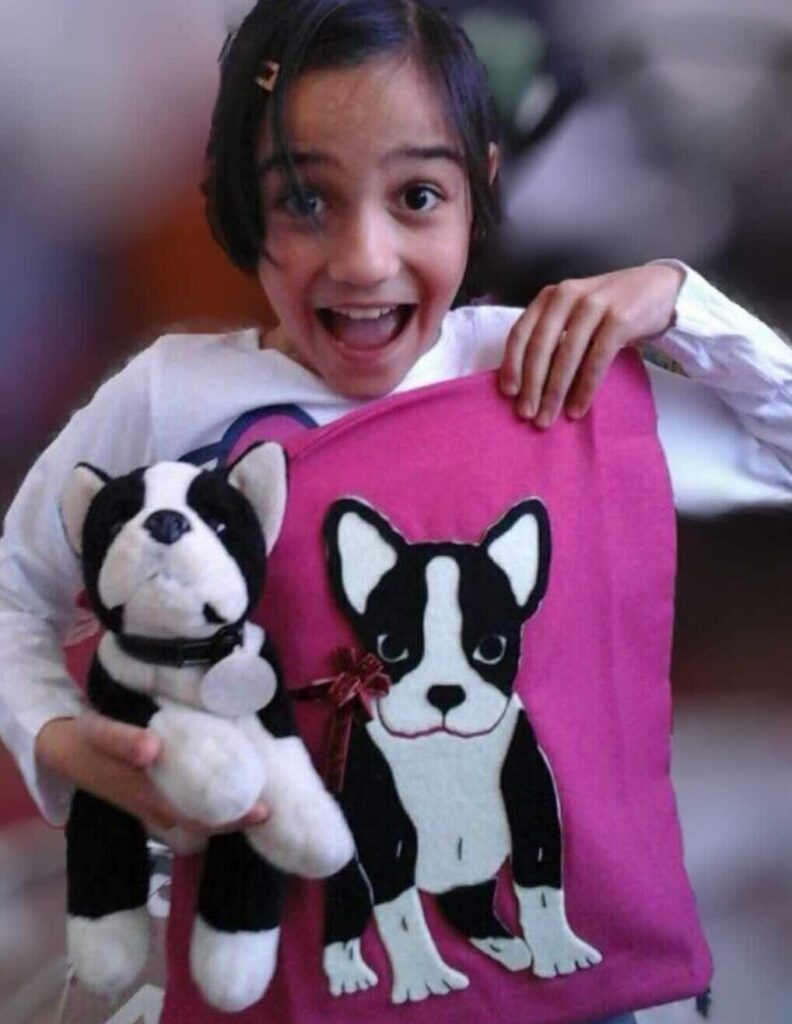
I decided to go for a throw pillow in the accent color of her new room (dark pink) and featuring the stuffed animal she was obsessed with: Jackson, the French bulldog. My idea was to make a puppy like Jackson out of a thick fabric and applying it on a cushion cover.
First, I used some pictures of Maia and Jackson to draw the puppy. And I had plenty, as she was carrying him with her almost everywhere. That was the easy part!
Then to keep it simple I bought a ready-made cushion cover 20×20 “ (50×50 cm). From a hobby store I bought white and black felt and the special glue for textiles. I added a little bow from a sparkling ribbon in a matching color.
Maia’s surprise and excitement have made everything worth it. She simply loved it and she wanted to know in detail how I made it. She made me promise that I will teach her, too, and that we will do another one together!
Final tips where you can buy simple cushion covers in many colors and also inner cushions 20×20 “ (50×50 cm). Ikea has many options with different materials (cotton, velvet) and many colors, from $3.99 (GURLI Cushion cover, plain cotton, 7 colors) to $8.99 (SANELA Cushion cover, velvet, 12 colors) or more.
Ikea has also inner cushions from $4.00 (with polyester filling) or $9.00 (with feathers). I recommend the feather one, as it will resist for years in good shape.
How cute, wish that I could be so skilled to do something similar!